Showing posts with label sewing. Show all posts

Saturday, August 22, 2015

Crafty Classroom and Currently Sewing

I wanted to share my latest projects to all of you crafty moms out there. They're not perfect but I like them a lot, and don't consider them a waste of my time. The first and the second I made for our homeschool classroom. The idea for the first one was from a picture a friend of mine posted on Facebook.


My friend Melanie posted the one on the right, and I loved it. The thought that is was awesome, and I just had to make my own. What I like most about it is, that it reminds the kids (and well anyone), that you can be whatever you put your mind to, and that possibilities are endless.

This was my second project. I thought of the idea a few weeks ago, but didn't have anything big enough to paint it on (or so I thought). I was going to go to the craft store and get a canvas, until a brilliant idea popped into my head. As you guys know we just moved, and thanks to that we have a lot of boxes just sitting around. So I found a nice sized box and cut it apart. All of us are Dr Who fans, and I like having a reminder of why reading is so awesome. This project was just a late night with a bunch of paint and Relient K playing in the background. IT WAS AWESOME!!

So onto sewing?
 My daughter had grown out of her Minnie mouse dress, or what we called her Minnie mouse dress, and her Tinkerbell dress had been reduced to rugs (which is really no surprise since it was a cheap costume). I was having a hard time finding replacements for the two, because of how cheaply made costumes are these days, so I just made her two dresses. I got the material and the pattern (they are made from the same pattern) from Joanns. I LOVE FABRIC STORS :) They were very easy and she loves them, so that's whats important. I figure if we do get to go back to Disney World (we are hoping for a trip next year) that these would be great for that, and will actually last until then, and way beyond. This was my first time following a store bought pattern, and it was very easy to follow, and the instructions were thorough.

I think they look good, and as long as people don't get to close, they won't notice all of the mistakes ;)


Thanks for reading my post. I hope this inspires all of you crafty moms, to get out there and make something beautiful. :)

Monday, June 23, 2014

Time to Catch Up?

Hey everyone, sorry about the gap in post, I've been kind of busy, and during my free time, I've been kind of lazy. Not surprising right? The boys finished school about a month ago, and they've been taking it easy, which is nice to watch. I think it's great when kids can just be kids. We got the new Mario Kart, and if you like the previous ones then you'll love this one. The only complaint I have is about the balloon battle part of the game. In past games, balloon battles were done in arenas, and that was fun and great, on this game, you pick one of the race tracks to do the battle. It's just like racing then, only with no value on placement, because in the racing mode, you are hitting each other on a race track, so the only real difference in battle are the balloons. Okay, but other than that, it's a great game.

I made my daughter a dress!

I got the idea from pinterest

The original blog it's from is LBG STUDIO. Now of course my dress isn't exactly like that one. I made some alterations, but I got the basic idea from their pattern.


The good news is I've washed it a few times, and it's still in one piece. :) Olivia has wanted to wear it everyday, and she calls it her Else dress.


In other news... ... WE ARE GOING TO HAVE VISITORS SOON! I'm excited! Can you tell? My brother Wesley, and his wonderful wife Jessica are flying a whole 3000 miles to come and see us. Yes wow! They are flying here on the fourth of July and staying for a full week. I'm looking forward to going hiking with them, and walking around Seattle with them, and just hanging out. No worries there will be a full blog post about their trip and all of the fun we had, once they leave.

As far as homeschooling goes for next year, I'm in gather mode. I'm getting books together, and everything else I need. The truth is it will be time to start school again before I know it, so it's time to get prepared.

Well that's all I have to report. Try and have some fun this summer, and let your kids be kids. :)


Friday, August 16, 2013

Mermaid Pants

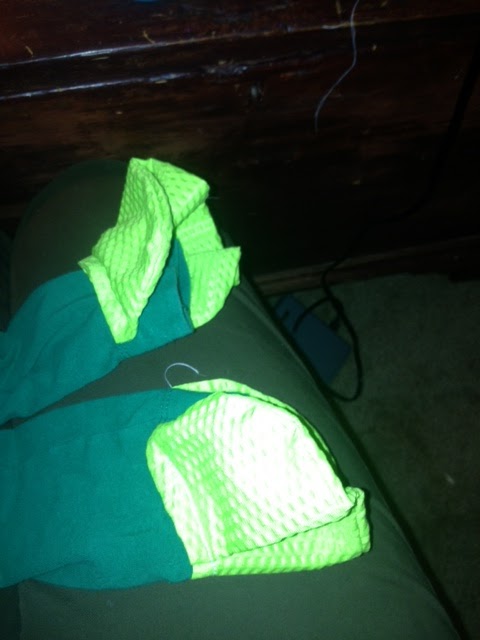
My daughter Olivia had a green pair of pants that she never wore. There were a hand-me-down from our neighbor in Jackson Park. I always wondered what I could do with them, because we didn't have anything to match them because they were just a strange color.


 Yup that's them! I had a weird dream one night about wearing mermaid pants, I awoke thinking "I'm sure Olivia would love to wear mermaid pants," and that's where I got the idea to turn these green pants into mermaid pants


 I started off by measuring around the bottom of the pants. So yeah 7 inches. I decided that I wanted the first strips of fabric to start and stop about half an inch form the inseam (I was making this all up as I went, so bear with me).


I cut 4 strips of fabric measuring 12 inches by 3 inches.


Then I rounded the top corners,


and I sewed them together making them 2 strips.


Time for pinning!


I pinned an inch of fabric, then an inch of folded over fabric, to make a ruffled effect.


Then I sewed all the way around.


Next was triangles. Since the pants were 7 inches at the bottom, I measured 8 inched of fabric for the bottom of the triangle.


I marked the beginning, the end, and half way.


From the half way mark, I measured up 6 inches, and from there drew a line from that mark to both of the ends, this make up the other sides of the triangle.


I maked 4 triangles


then sewed them together to make 2 (yes this does look like a bikini top).


Next I pinned and sewed them onto the bottom of the pants, under the previous strip of fabric.


All done! I would have taken more photos of after, but she run off after that. :)

Tuesday, September 6, 2011

Summer to Fall DIY money saver

So most of you, like me, are doing the great clothing switch. You are putting away your kids' summer clothes, and bringing out the winter.

And during all of this, you run into something like this...


This shirt (18mos.) still fits her, but is for the wrong season...


This shirt (12mos.) is for the right season, but to small...


... If only there was some way to put them together.


Yes that was my idea! So I decided to put them together and here is how.


Cut the sleeves off of the long sleeve shirt (that is to small)


Which will leave you with this


Now turn both inside out, and sew them together (like this)


End result (I did a tank top too)


It was super easy!


For all of you pinterest fans, here a picture you can pin...